| imaginationlessontext.docx |
I. OVERVIEW
LESSON TITLE: Creature Feature
LESSON SUMMARY: The lesson focuses on Tim Burton, and his imagination and creation of creatures. Students will then explore their own monster ideas, illustrate them on canvas board, and then bring them to life with the use of color theory when applying paint. Through this lesson the students will be able to express their creative minds through illustration and painting.
GRADE LEVEL: 5th
ANTICIPATED CLASS SIZE: 30 students
CLASS TIME/DATE :40 minutes, 1 day a week, 4 sessions
A. BIG IDEA: Imagination
B. ENDURING UNDERSTANDINGS (UBD): Imagination forms a mental image of something not present to the senses or never before wholly perceived in reality. It enables the mind to be creative and resourceful. Developing new resources while creating art fosters necessary mental growth like problem solving and social growth such as communication. Without imagination in the art room there would be no original art, everything would be a carbon copy. With a greater understanding of their imagination children can have original ideas that can bring a fresh outlook to their everyday norms.
C. BACKGROUND INFORMATION: When entering into the classroom the students will be expected to have some understanding of what is required of the standards. The students will be expanding upon their knowledge of the elements and principles while further exploring painting techniques and learning about healthy relationships between people. The students will also be exploring their own individual voice through their imagination.
D. MATERIALS/EQUIPMENT, ROOM ARRANGEMENT:
1. ROOM ARRANGEMENT: The room is arranged with 7 student working tables, 4 seats located at each table. At the center of the classroom will be the teacher demo table, where the students will relocate to as needed for demonstrations. Supplies will be stored in given storage throughout the classroom.
2. MATERIALS: Pencils, (at least one for every student), at least 30 erasers, a large assortment of paintbrushes, with a minimum of one per student, a large assortment of cups for water, paper towels, pencil sharpeners, totes to carry art making supplies in (1 per table), at least 60 canvas boards, white drawing paper, large assortments of colored pencils, at least 7 pairs of scissors for cutting, sharpee markers, large containers of tempra or acrylic paint: white, black, red, blue, yellow, green, orange, and purple, glue, tape, name tags, tri-fold board, 11x17 sheets of paper, laminate, projector, computer, Tim Burton illustration book.
E. VOCABULARY/ REFERENCE SOURCES:
-Tim Burton – A contemporary artist who works in film and illustration.
-Imagination – The faculty or action of forming new ideas, or images or concepts of external objects not present to the senses.
-Primary Colors - Any of a group of colors from which all other colors can be obtained by mixing. (Ex: Red, Yellow, Blue)
-Secondary Colors - A color resulting from the mixing of two primary colors. (Ex: Purple, Green, Orange)
-Illustration - A picture that helps make something clear or attractive.
-Shape - An enclosed space, the boundaries of which are defined by other elements of art (i.e.: lines, colors, textures, etc.). Geometric shapes like circles, rectangles, squares, triangles and so on have clear edges. Organic shapes like an amoeba, or cloud have natural, less well-defined edges.
-Line - A basic element of art, referring to a continuous mark, made on a surface, by a moving point. A line is long relative to its width. It can define a space, create an outline or pattern, imply movement or texture and allude to mass or volume.
-Elements and Principles of Design -http://new.4-hcurriculum.org/projects/kidspace/E-P.htm
Oxford Dictionary
"Oxford Dictionaries Online (US)." Oxford Dictionaries Online (US). Oxford University Press, n.d. Web. 04 Mar. 2013. <http://oxforddictionaries.com/us>.
-Tim Burton Website- www.timburton.com
-Tim Burton film
The Nightmare Before Christmas. Dir. Henry Selick. Perf. Danny Elfman, Chris Sarandon, and Catherine O'Hara. Touchstone Pictures, 1993. DVD. YouTube. RainybopStarwars, 28 Oct. 2005. Web. 4 Mar. 2013. <http://www.youtube.com/watch?v=xpvdAJYvofI&feature=em-share_video_user>.
-‘The Art of Tim Burton’ large artist book of illustrations
-Burton, Tim, Leah Gallo, Holly C. Kempf, and Derek Frey. The Art of Tim Burton. Los Angeles, CA: Steeles, 2009. Print.
-MoMA website - http://www.moma.org/interactives/exhibtions/2009/timburton/index.php
II. STANDARDS/OBJECTIVES
A. STANDARDS:
Visual and Performing Arts Standards
-1.4.5.A.3 - Demonstrate how art communicates ideas about personal and social values and is inspired by an individual’s imagination and frame of reference (e.g., personal, social, political, historical context).
-While the students are imagining their own monsters, they are going to be exploring and elaborating on their own application of imagination in their work.
-1.1.5.D.1 - Identify elements of art and principles of design that are evident in everyday life.
-Through the final stages of the creative process, the students will be extensively relying on color to create their monster and bring it to life.
-1.3.5.D.1-Work individually and collaboratively to create two- and three-dimensional works of art that make cohesive visual statements and that employ the elements of art and principles of design.
-Through a two stage process of collaborative work and individual two-dimensional work, color, line and shape will be used to create the monster artwork.
21st Century Life and Career Skills
-9.1.8.C.1 - Determine an individual’s responsibility for personal actions and contributions to group activities.
-During this lesson, the students will work collaboratively in a group activity and will be asked to participate is specific rolls during the creative process.
Literacy
-ELA-Literacy.W.4.3a- Orient the reader by establishing a situation and introducing a narrator and/or characters; organize an event sequence that unfolds naturally.
- In addition to the creation of monsters, the students will be asked to write a short narrative about their monster to give their creation character.
B. OBJECTIVES
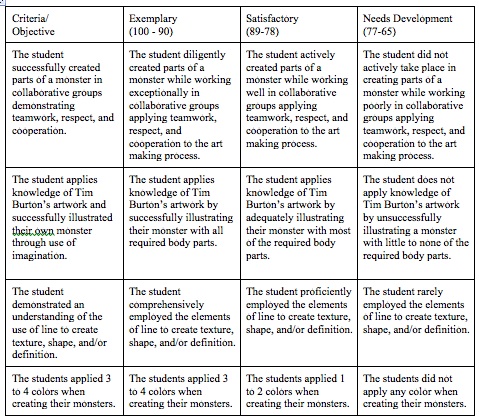
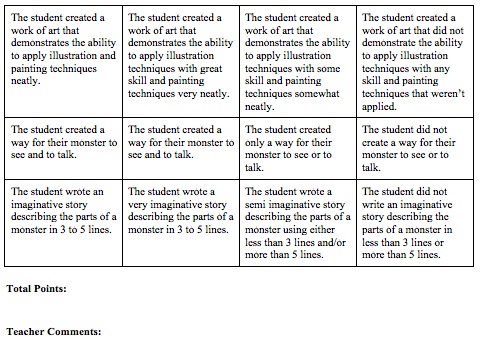
1. The students will successfully create parts of a monster in collaborative groups demonstrating teamwork, respect, and cooperation by working together in a timely fashion.
2. The student will apply knowledge of Tim Burton’s artwork and successfully illustrate their own monster through the use of their imagination.
3. The students will demonstrate an understanding of the use of line to create texture, shape, and/or definition by drawing their monster out on canvas board.
4. The students will write an imaginative story describing the parts of a monster in 3 to 5 lines.
III. LEARNING EXPERIENCE
A. ESSENTIAL QUESTIONS
1. What is imagination?
2. Why is imagination important in everyday life?
3. What is the relationship between art and imagination?
B. INTRODUCTION - DAY 1
As the students enter the room, we will ask the students to take their seats. A short clip from Tim Burton’s The Nightmare Before Christmas will be played to catch the students attention. Once the clip has finished, a few questions will be asked about what they saw. Imagination will be introduced as the theme for the lesson to the class.
C. SEQUENCE OF ACTIVITIES/ORGANIZER
LESSON TITLE: Creature Feature
LESSON SUMMARY: The lesson focuses on Tim Burton, and his imagination and creation of creatures. Students will then explore their own monster ideas, illustrate them on canvas board, and then bring them to life with the use of color theory when applying paint. Through this lesson the students will be able to express their creative minds through illustration and painting.
GRADE LEVEL: 5th
ANTICIPATED CLASS SIZE: 30 students
CLASS TIME/DATE :40 minutes, 1 day a week, 4 sessions
A. BIG IDEA: Imagination
B. ENDURING UNDERSTANDINGS (UBD): Imagination forms a mental image of something not present to the senses or never before wholly perceived in reality. It enables the mind to be creative and resourceful. Developing new resources while creating art fosters necessary mental growth like problem solving and social growth such as communication. Without imagination in the art room there would be no original art, everything would be a carbon copy. With a greater understanding of their imagination children can have original ideas that can bring a fresh outlook to their everyday norms.
C. BACKGROUND INFORMATION: When entering into the classroom the students will be expected to have some understanding of what is required of the standards. The students will be expanding upon their knowledge of the elements and principles while further exploring painting techniques and learning about healthy relationships between people. The students will also be exploring their own individual voice through their imagination.
D. MATERIALS/EQUIPMENT, ROOM ARRANGEMENT:
1. ROOM ARRANGEMENT: The room is arranged with 7 student working tables, 4 seats located at each table. At the center of the classroom will be the teacher demo table, where the students will relocate to as needed for demonstrations. Supplies will be stored in given storage throughout the classroom.
2. MATERIALS: Pencils, (at least one for every student), at least 30 erasers, a large assortment of paintbrushes, with a minimum of one per student, a large assortment of cups for water, paper towels, pencil sharpeners, totes to carry art making supplies in (1 per table), at least 60 canvas boards, white drawing paper, large assortments of colored pencils, at least 7 pairs of scissors for cutting, sharpee markers, large containers of tempra or acrylic paint: white, black, red, blue, yellow, green, orange, and purple, glue, tape, name tags, tri-fold board, 11x17 sheets of paper, laminate, projector, computer, Tim Burton illustration book.
E. VOCABULARY/ REFERENCE SOURCES:
-Tim Burton – A contemporary artist who works in film and illustration.
-Imagination – The faculty or action of forming new ideas, or images or concepts of external objects not present to the senses.
-Primary Colors - Any of a group of colors from which all other colors can be obtained by mixing. (Ex: Red, Yellow, Blue)
-Secondary Colors - A color resulting from the mixing of two primary colors. (Ex: Purple, Green, Orange)
-Illustration - A picture that helps make something clear or attractive.
-Shape - An enclosed space, the boundaries of which are defined by other elements of art (i.e.: lines, colors, textures, etc.). Geometric shapes like circles, rectangles, squares, triangles and so on have clear edges. Organic shapes like an amoeba, or cloud have natural, less well-defined edges.
-Line - A basic element of art, referring to a continuous mark, made on a surface, by a moving point. A line is long relative to its width. It can define a space, create an outline or pattern, imply movement or texture and allude to mass or volume.
-Elements and Principles of Design -http://new.4-hcurriculum.org/projects/kidspace/E-P.htm
Oxford Dictionary
"Oxford Dictionaries Online (US)." Oxford Dictionaries Online (US). Oxford University Press, n.d. Web. 04 Mar. 2013. <http://oxforddictionaries.com/us>.
-Tim Burton Website- www.timburton.com
-Tim Burton film
The Nightmare Before Christmas. Dir. Henry Selick. Perf. Danny Elfman, Chris Sarandon, and Catherine O'Hara. Touchstone Pictures, 1993. DVD. YouTube. RainybopStarwars, 28 Oct. 2005. Web. 4 Mar. 2013. <http://www.youtube.com/watch?v=xpvdAJYvofI&feature=em-share_video_user>.
-‘The Art of Tim Burton’ large artist book of illustrations
-Burton, Tim, Leah Gallo, Holly C. Kempf, and Derek Frey. The Art of Tim Burton. Los Angeles, CA: Steeles, 2009. Print.
-MoMA website - http://www.moma.org/interactives/exhibtions/2009/timburton/index.php
II. STANDARDS/OBJECTIVES
A. STANDARDS:
Visual and Performing Arts Standards
-1.4.5.A.3 - Demonstrate how art communicates ideas about personal and social values and is inspired by an individual’s imagination and frame of reference (e.g., personal, social, political, historical context).
-While the students are imagining their own monsters, they are going to be exploring and elaborating on their own application of imagination in their work.
-1.1.5.D.1 - Identify elements of art and principles of design that are evident in everyday life.
-Through the final stages of the creative process, the students will be extensively relying on color to create their monster and bring it to life.
-1.3.5.D.1-Work individually and collaboratively to create two- and three-dimensional works of art that make cohesive visual statements and that employ the elements of art and principles of design.
-Through a two stage process of collaborative work and individual two-dimensional work, color, line and shape will be used to create the monster artwork.
21st Century Life and Career Skills
-9.1.8.C.1 - Determine an individual’s responsibility for personal actions and contributions to group activities.
-During this lesson, the students will work collaboratively in a group activity and will be asked to participate is specific rolls during the creative process.
Literacy
-ELA-Literacy.W.4.3a- Orient the reader by establishing a situation and introducing a narrator and/or characters; organize an event sequence that unfolds naturally.
- In addition to the creation of monsters, the students will be asked to write a short narrative about their monster to give their creation character.
B. OBJECTIVES
1. The students will successfully create parts of a monster in collaborative groups demonstrating teamwork, respect, and cooperation by working together in a timely fashion.
2. The student will apply knowledge of Tim Burton’s artwork and successfully illustrate their own monster through the use of their imagination.
3. The students will demonstrate an understanding of the use of line to create texture, shape, and/or definition by drawing their monster out on canvas board.
4. The students will write an imaginative story describing the parts of a monster in 3 to 5 lines.
III. LEARNING EXPERIENCE
A. ESSENTIAL QUESTIONS
1. What is imagination?
2. Why is imagination important in everyday life?
3. What is the relationship between art and imagination?
B. INTRODUCTION - DAY 1
As the students enter the room, we will ask the students to take their seats. A short clip from Tim Burton’s The Nightmare Before Christmas will be played to catch the students attention. Once the clip has finished, a few questions will be asked about what they saw. Imagination will be introduced as the theme for the lesson to the class.
C. SEQUENCE OF ACTIVITIES/ORGANIZER
|
Timing
1 Min 2 Min 4 Min 3 Min 1 Min 5 Min 15 Min 2 Min 7 Min |
Teacher/ Questions Actions
Ask the students to settle into class and quietly take their seats. Show the students the teacher introductions. Play clip from Tim Burton’s The Nightmare Before Christmas the song “This is Halloween” Ask students several questions about the clip they had just watched. The teachers then asks the student sitting in seat A to grab the supply totes. Meanwhile, the teachers pass out the paper to for the activity and monster part directions to each table. The teachers begin to explain the art making activity/hook. This activity has each table in the classroom to create a piece of a monster: 1. Fuzzy head shape and crooked teeth 2. One big eyeball and 2 horns 3. Big fuzzy body shape 4. One scary arm, one not scary arm 5. One scary arm, one not scary arm 6. 2 big funny feet 7. One big strong tail In this time, the students will be working quietly at their tables to create their monster body part or parts. The teachers will be circulating the classroom to help the groups and over see that they are properly following directions. Taking observation of the quietness of the tables and following of directions for their points system. (Continuing with the teachers point system that is used on a day-to-day basis). Also, any questions the students have will be answered. Ring the bell for clean up. The students will be assigned jobs to help the cleanup process. The assigned jobs will be written on the board for the students to see. The teachers will then ask the students to gather around the demo table calling on one table at a time to come up. Once the students are around the table, the teachers will begin to engage in dialogue with the students and assemble their body part or parts into a monster. Imagination will be introduced to the class as the big idea and the main focus for their art making activity The students will get their points before they leave like every class. |
Dialogue
Good Morning Class! Please take your seats so we can get started. We are going to start today by introducing ourselves to you. My name is Mr. Roselle and My name is Mrs. Seich. Here we have our families and friends. Next we have several of our interest. Lastly you can see here a number of our artworks both from school and personal projects. So now that you know a little more about us we are going to get started with our lesson for the next couple of weeks. Lets start by showing you a little movie clip. Cool? YEA! What did you think of this clip? It was creepy! What did you think of the of the creatures? The monsters were scary and crazy! Does anybody know what movie this is from? Is it the Nightmare before Christmas? Yes! Very good. Now how many of you have seen this movie? (Several students raise their hands) Ok good, not as many as we thought but we will go into this movie and others later on. SO everybody return to their seats and we will explain what everybody is going to be doing. Student A please grab the supply totes for the tables, quickly and quietly. We will be passing out piles of colored construction paper, please do not touch the paper yet. Also, we will be giving each table a slip of paper face down. Do not touch the paper until we are ready for you to. In a minute I am going to ask you to flip over the slips of paper. Each table has a body part of some sort listed on the slip. Your job is to create that body part or parts, from different colors of construction paper. Each student will have a different job in creating the body part or parts of a whole monster. We want to make sure that everyone is active in the creative process so everyone can be proud of what they make! When you are done, clean up around yourself then sit quietly and wait for the class to finish. Please students, don’t rush, these pieces are going to be hung up when you are done! Any questions about what you are to do? I am not comfortable with drawing.. Don’t worry! You don’t have to draw if you aren’t comfortable with it. You could be the person that cuts out the part or parts. Can I make additional parts? Only if what you created is finished. Make sure whatever additional parts you make, are relevant to the slip of paper we gave you. So say we have you making the head, you could add a hat or glasses to the monster part. How about a mustache?! Perfect. Now flip over your slips of paper, and start creating! What’s a not scary arm? Think of mickey mouse, he has big cartoon round hands. Those aren’t scary. The monsters in the video had scary arms with pointed fingers. Our group can’t think of anything for the head? Okay think of the clip we just watched. Was there a monster that had a round head you liked? What about the witches, their heads were pointy, thats different. Did you like that? Use your imagination but if you are still stuck draw what you liked from the video. Is this a good foot? Do you think these feet are funny? Are they big enough? I guess its big. Well why don’t you try to fill up the whole piece of paper with the feet? Then they will be really big! Okay, stop what you are doing! It’s time to clean up. We need the person sitting in seat A to place back the table totes in their normal spots. Person B clean up all scrap paper on your table and check the floor for anything that has dropped. Person C check to make sure all the supplies are back in the totes. Person D bring up your cut out body parts to the demo table. Then return to your seats quietly. As you can see each table had a different body part to create. We are going to assemble the parts together to make one big classroom monster. Once it is dry we will hang it up on the wall for you to see next week when you come in. Each group did a fantastic job today at participating in the art making process. You all must have noticed that all of the body parts that you have created are very different and imaginative! Every did a great job in using your imaginations when creating your monster. This is going to be our big idea for creating your monsters, imagination! The next time we meet, you are going to be creating your own individual monster that you created from your imagination. So over the next week thing about monster parts, or maybe find a monster movie to watch! As we are assembling your monster did anybody have a name they wanted to give your monster? Peanut MAN! Haha. Good, we like that. So did anybody have any troubles while creating their parts? -We made the head too small at first. -Organizing the tail together. Right, well everybody did a great job working through their problems and as you can see every group came up with something completely different then the table next to them. Great job today! Everyone return to your tables and wait quietly for us to give out the points. Here are the points for each table today (Points will be given out loud to each table according to that days work. Listening abilities, quietness, and productivity. Same point system as the Co Op teacher currently uses.) |
D. CLOSING/ CULMINATING EXPERIENCE - Day 1
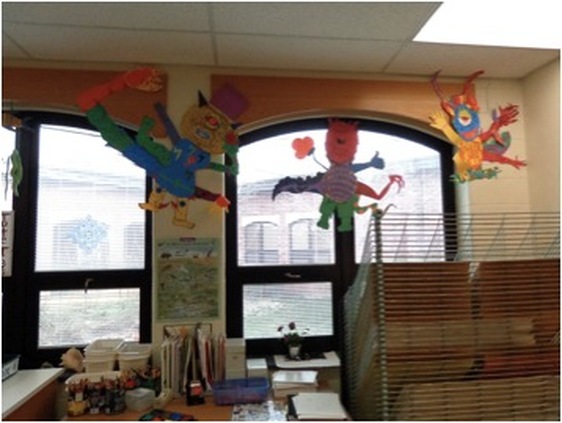
The students saw their activity come to life as a new classroom monster while the teachers assembled the body parts. This monster will be occurring through the lesson and will be a constant reminder to the class how to continually use their imagination. The students will be asked to tap into their imagination when creating their own monster paintings. They will begin to think about parts of animals and other created creatures from movies or from dreams to reference when making their monsters.
B. INTRODUCTION - Day 2
As the students quietly enter into the classroom they will notice that the monster they had created will be hanging on the wall along with the teacher monster example. There will also be an additional monster from the 3rd period class hanging up. We will discuss how each class was able to use their imagination to create something completely different from one another.
C. SEQUENCE OF ACTIVITIES/ORGANIZER
|
Timing
1 Min 2 Min 6 Min 6 Min 3 Min 20 Min 4 Min 2 Min |
Teacher/ Questions Actions
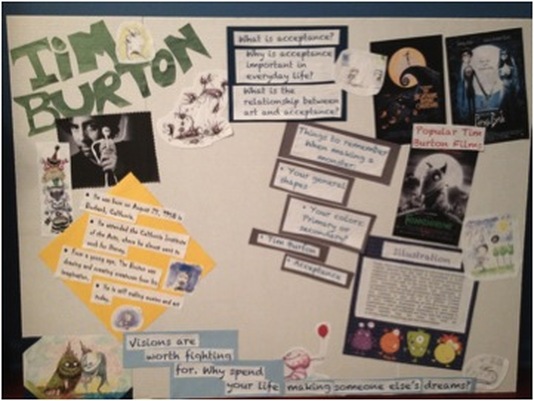
Ask the students to settle into class and quietly take their seats. Have the students greet Gurgles as they enter. Quickly discuss the big idea of imagination. Allow the students to notice that there is a second monster on the wall as well from the 3rd period class. They will be able to notice how different each monster is from each other. Ask the students to come to the demo table as they are called by their tables. Tim Burton will now begin to be introduced as the main artist. The tri-fold board with visuals and factual information on Tim Burton will be shown to the students and elaborated on. A book of Tim Burton’s illustrations and concept art will be shown to the class for inspiration. From there, the teachers will tell the students of the their next assignment. They will be asked to create a Tim Burton inspired monster out of tempra paint on canvas board. But first, the students must create their sketches of their monsters on scratch paper. Then they be transferred to canvas board to prep for painting. A demo will be given to the students about the new assignment. This demo will allow the students to see the process of creating their own monsters. At each one of the tables, there will be a reference mat with illustrations of monster parts. This breaks down the process of creating a monster, just like how they created their monster in parts. The materials that are necessary for the demo are pencil, canvas board, and our own monster reference mat to show the students. The students will be asked to return to their seats and each student will be assigned a task to retrieve supplies. Student A can get the canvas board for their table and student C can get the supply totes for their tables. During this time the teachers will begin to play a slideshow of Tim Burton’s works that will play during the remainder of class for inspiration. The teachers will also pass out the monster reference mats to each table at this time. In addition, if a student wants to draw their ideas out on scratch paper before drawing on canvas board, they can raise their hands and it will be given to them. The creation process can begin and the students may start to sketch out their monsters. The teachers will walk around the classroom to assist students with any questions or problems they encounter when making their monsters. Ring the bell for clean up. The students will be assigned jobs to help the cleanup process. The assigned jobs will be written on the board for the students to see. Review the assignment for the students and forewarn them that the following week the students will begin to start painting their monsters. The students will get their points before they leave like every class. |
Dialogue
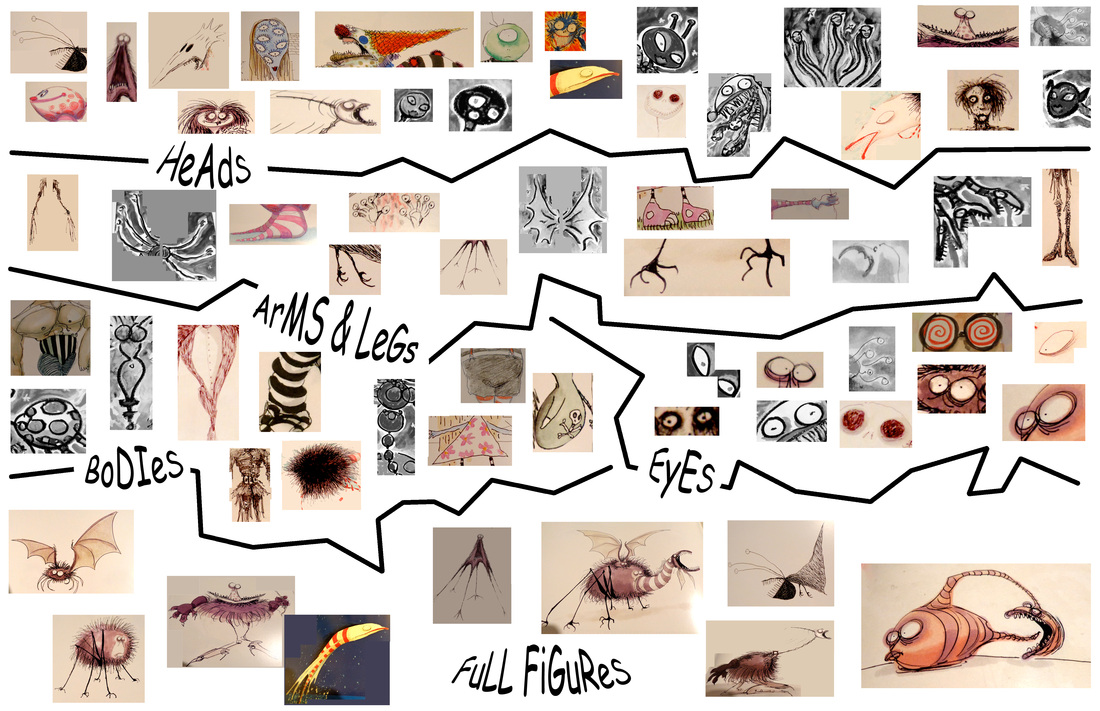
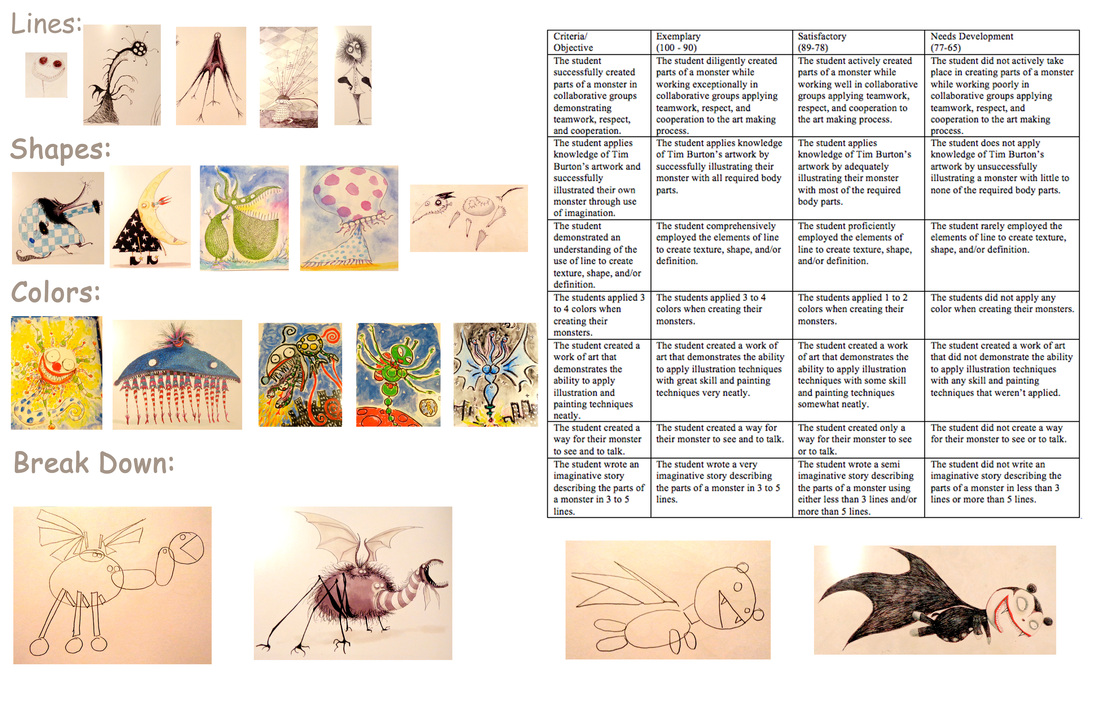
Good morning students! Please take your seats! Don’t forget to say hello to your monster as you are sitting down! It looks great up on the wall. As you can see we hung up our monster along with the other periods. Wow! That other monsters is cool! See how each each class created completely different parts? Even with watching the movie it's fascinating to see that you all had different ideas of how to create your parts given the same directions. Clearly every body used their own imaginations to come up with what they liked. We are extremely impressed how everybody worked so well together. Ok tables 1, 3, 5, 7 with your stools come up to the demo table. Tables 2, 4, 6 are next with your stools. (Students gather around the demo table) So does everyone remember the video that watched last week? Yeah, it was a Nightmare Before Christmas! Does anyone know who created the movie? Noo... Who?! The creators name is Tim Burton. (One of the teachers will then open the tri-fold artist board) Does anyone else recognize any of his other movies? Frankenweenie! Alice in Wonderland! Corpse Bride! Paranormin! Paranormin was actually not created by Tim Burton but, that artist was REALLY inspired by his work. Frankenweenie, Alice in Wonderland, and Corpse Bride are all movies he created characters for! Great job. Tim Burton was born on August 25th 1958, in Burbank California. He attended the California Institute for the arts and after he went to work for Disney. He is known for popular movies like Frankenweenie (2012), Alice In Wonderland (2010), and The Nightmare Before Christmas (1993). Even when he was a little boy, he was drawing and creating creatures from his imagination. He is still making movies and art today. (Reference the tri-fold board with his illustrations and other images) Here are some of Tim Burton’s illustrations, that we have picked out for you. What do you think of this monster? He is really crazy looking! I like those colors! So everyone, we are going to have you create your own individual monsters on canvas boards that you will eventually paint and hang on the walls with the large monsters. (Show teacher example) COOL! First, we are going to start out by designing our monsters. For the sake of time, we are going to have you draw in pencil directly on the canvas panel. If you are stuck and not sure what to draw right away you can grab a scrap piece of paper and work out your ideas quickly. When you are drawing your monsters, it is best to break them down into shapes. At each table there will be a monster reference mat (holds up example mat) so if you get stuck you can pick out different monster parts just like we did the other day in class. The mat is only for reference, but don’t be afraid to come up with something different, use your imagination to come up with something. On the front of the mat we broke down the different parts like eyes, arms and legs, body shapes, and different heads for reference. On the back we gave full examples of Tim Burton creatures that show good use of line, different bodies that he made from simple shapes and then some super colorful monsters he painted. There are 2 examples of his monster on the bottom and right next to the we broke down their bodies into the very basic shapes. As you can see his crazy organic looking creatures are really just different shapes put together. And of course we added your grading rubric to the back so you can always look back if you forget what we are looking for you to complete. To start drawing, take your canvas panel, pencil and eraser and set them in front of you. Draw the general shape of the body first in the center of your canvas board. Make sure to leave enough room on all sides for the head, arms, feet, and anything extra you want to add like a tail or wings. Next draw your head shape. Start to give him features, like 3 eyes, maybe some horns, big ears, and sharp teeth, things like that. Remember to keep your sketches simple so you can paint over them. After the head, go back into the body and start giving your monster arms. They could be thin and claw like, or big strong muscular arms, even tentacle like arms. Next is the legs, they could match your arms or be completely different from the arms that you have. Now go back into the body and do a basic drawing of a texture you want to give the body, it could be spots, or fur, or even scales. Finally, if you want you can give your monster wings and/or a tail. The only directions we will give you is that you must have some sort of facial features like eyes and a mouth. Everything else is up to you on body shape and arms or legs. Remember to draw simply and lightly at first. You will be painting these so there is no need to go into a lot of detail with your pencil marks. And watch the pencil smudges on the canvas. You don’t want dirty thumbs prints all over it that you will need to erase later. Any questions about what you are making? Can I have it wearing a hat? Sure, I like that idea. You are free to dress your monster any way you want, without getting overly detailed. You don’t have to dress your monster if you don’t want to. Any other questions? Can it have more than one head or like a friend with it? Sure! be creative, add what you like to it. As you can see many of Tim Burton’s monster have several heads and random parts. (point to a specific monster on the board that shows) Can it have robot parts? Excellent question. And yes thats a great idea. Just like Tim Burton you can use ideas you have had from different dreams or nightmares. You can use anything you would want, like robot parts, insect parts, or your favorite animal parts. Whatever you can imagine. For example somebody give me your favorite animal. Alligator! Good, now what is your favorite feature on the alligator? His big mouth. Right. So you can start with that in mind. Give your monster a big old mouth with lots of teeth and then go from there. Just remember you are not drawing an alligator but just taking parts of it and combining it with different parts from your imagination. Class, do not forget these drawings need to be done today. Okay? If not we can give only a few minutes in class next week to finish up. Please students return to your seats. For retrieving supplies we would like the Student at seat A to get their canvas panels for their table and student C can get the supply totes for their table mates. We are going to start a silent slide show of Tim Burton’s illustrations for you to look at in addition to the mats. We are also going to hand out your monster mats at this time. First thing's first though. When you get your canvas board make sure to write you name and homeroom teachers name on the back. Hey do you need help with anything? I don’t know what to draw. Okay, thats not a problem. Lets think like we said before. What's your favorite animal or bug? A Panda. haha. Alright good. What is your favorite part about a panda? His big furry body and head. haha. ok so lets draw that out right out on the canvas. Keep it simple and just draw the basic big body and head shape. That looks good! Keep going! Just remember, you are going to give him some sort of features on his face that are different than a pandas. Okay are you good? Yes. Thank you. Does my monster have to have arms? Not if you don’t it to, but it has to have some other facial features like an eye and a mouth. You can make whatever shape you want. If you want it to have arms then give it arms. Okay? Yeah, thats good. Thank you. Do you like this? Is it ok? Well do you like it? Yes. Then its going great. Remember these are your monsters that you are creating using your imagination. There is no wrong or right answer to what they should look like. Just have fun with it. Okay, stop what you are doing! Make sure your name and homeroom teacher is on the back of your board. It’s time to clean up. We need the person sitting in seat A collect the canvas board and pile them on the demo table. Person in seat B check the floor for anything that has dropped. Person C check to make sure all the supplies are back in the totes. Person D bring the totes to their normal storage spots. Then return to your seats quietly. Okay class, next week we are going to continue to work on these. We are going to start to give them color. So be prepared to be a little messy, just in case when we are painting. Before you leave today, don’t forget to say goodbye to Gurgles and his new friends. He is really excited to have more monster friends soon. Now it is time to distribute the points for the tables that worked the most quiet, and cleaned up after themselves. |
D. CLOSING/ CULMINATING EXPERIENCE - Day 2
After the students have cleaned up and settled down into their seats the teachers will ask the students some questions about Tim Burton and his works. These questions will be general questions about his films, if they enjoyed them or not, and if they have any favorite character from those films. Finally, we will ask the students if they think that any of his movies talk about the theme of acceptance? The students will discover that the movies that have been listed on the board, all teach their audience about acceptance of others, no matter their differences.
B. INTRODUCTION- Day 3
As the students file into the classroom the teachers will welcome them. They will quietly take their seats and notice that there is now a third monster hanging on the wall with the other two Gurgles that were created by the classes. A short conversation will be started with the class about how their attention and love towards him, is reflecting to other monsters, and he is gaining more monster friends.
C. SEQUENCE OF ACTIVITIES/ORGANIZER
|
Timing
1 Min 2 Min 11 Min 20 Min 4 Min 2 Min |
Teacher/ Questions Actions
Ask the students to settle into class and quietly take their seats. Then ask the student to say hello to their monsters. Ask the folder monitors to pass out the student’s canvas boards to their owners. Student A to retrieve the paints for the table. Student B get the table papers towels. Student C retrieve the rushes and cups of water. Student D retrieve the monster reference mats. Ask the students to come to the demo table as they are called by their tables. Review the color wheel and discuss the next part of their assignment. The teachers will then do a painting demonstration. A recap of Tim Burton will also be done while working on their monsters. The students will be asked to return to their seats and continue to work on their monsters. The teachers will be walking around the room to assist the students in their creative process and answer any questions they have. Ring the bell for clean up. The students will be assigned jobs to help the cleanup process. The assigned jobs will be written on the board for the students to see. Review the assignment for the students and forewarn them that the following week the students will have to be finished with their monsters. The students will get their points before they leave like every class. |
Dialogue
Good morning students! Please take your seats! Don’t forget to say “good morning” to our monsters as you are sitting down! Good Morning monsters! Class we are going to get started right away today with working. So we need the folder monitors to pass out the student’s canvas boards to their owners. Student A please grab the paints that we have already put on the supply table. Student B could grab the paper towels. Student C can grab the brushes and cups of water. Finally Student D can grab the monster reference mats for their table. Ok tables 1, 3, 5, 7 with your stools come up to the demo table. Tables 2, 4, 6 are next with your stools. From last week who can tell me some fact about Tim Burton? He creates his monsters from his nightmares or dreams. Tim Burton created The Nightmare Before Christmas, Corpse Bride, and Frankenweenie. He worked for Disney! You all remembered so much! One more! Tim Burton was creating monsters since he was little! You all have excellent memories! Way to go! Students, a show of hands how many of you have completed your Tim Burton inspired monsters? (Most of the students raise hands) Good! You should all be done with the drawing stage, or really close to being finished. Don’t worry if you are not we will come around to help those that are not finished. Now to move on to the color stage. We know that Mrs. Halter did a fantastic job teaching you the color wheel, but we feel we should do a quick little review. What are the three primary colors? Red, Blue, and Yellow! Great! Does anyone know the secondary colors? Orange, Green, and Purple! Okay, good job class! When you are painting your monsters, you are going to choose to use only the primary colors to paint your monster or only the secondary colors to paint your monster. Before you begin painting, we are going to pass our sharpie markers. Please use the sharpie first before you start painting to outline your pencil lines so you can see the marks you made more clearly. This will also be used instead of black paint for outlining. There is a thin marker, for more fine lines and tiny details, and a normal black sharpie that you can use for most of your lines. We personally used the thicker markers so all of you can see the monster better for the demo and because the thicker lines, to us, look neater. Please don't rush too much with the sharpie lines because you want them to look clean, it will be easier for you to follow them if they are cleaner. Remember not to color in with the sharpies. They are just there to outline and use for details. We have seen you are all wonderful artists, and you know how to paint, but we will do a short recap if necessary. First of all, it is important that you have your paints, brushes, cups of clean water, and paper towels set up by you. When applying the water to the tempera paint, after you have wet your brush, you can see that the amount of water you use changes the consistency of the paint. We want your first layer to be thin, and then for you to add on the paint after to make it darker. When using the brush, make sure you do not press too hard and move in different motions. What is best, is to move the paint in the direction you are holding your handle. So if your handle is facing your right shoulder, pull the paint in a light motion towards your shoulder. This way, your marks will be clean and will flow. You want to try your best to stay in the lines you made with the paint so it is less for you to correct later on. Most of all, think of value. When you are painting if you want softer colors, don’t apply so many layers of paint. If you want a bold color, apply more layers. Think of contrast too, what colors would contrast better next to another color. When you are creating these, don’t forget to look at your reference mats with Tim Burton artwork. Also if you make a mistake and want to correct it wait till the paint drys. Do not try to cover up a wet color with another wet color because they will mix. Or redraw with the sharpie on top of wet paint because it will bleed out and give you a sharp line. (Teacher pulls out Tim Burton book) Notice, most of Tim Burtons colors are really bold, like your monsters will be. Class, are we ready to get to work? Yeah! Do we have any questions about the sharpies? Are we using them first? Yes. Use the sharpie first and then apply the paint around them. Think of the sharpie as creating a dark outline so it will be easier for you to create your artwork. Do you have any questions about the painting process or the colors? Can I use Red, Blue, and Purple? Purple is a secondary color, and if you would like to use red and blue, it would be best if you used yellow so it is really vibrant and it stays within the primary colors. Okay class! Return to your seats, and get to quietly get to work! Can I use black? No. The sharpie will substitute as the black paint so you have the clean marks from the sharpie. You can use black to fill in tiny pupils on your monster though. Yeah, okay! Thank you! I messed up and painted my arm while the torso was still wet. What should I do? Don’t worry about that, we can just let the paint dry a little and then go over it with another layer of blue paint so you don’t see the mixing too much. Okay? Okay! Thank you. I am not sure what color i should paint my mouth? Hmm.. Well, you already painted the head green, why don’t you paint it purple so it looks like a big, dark mouth that is loud. Okay! I like that Good, you are doing a really nice job! Okay, stop what you are doing! It’s time to clean up. Student A collect the brushes from your table and take them to the sink to clean them properly. Student B collect and dump the dirty water from your table, and put clean water in the cups. Student C toss out all the old paper towels and replace them with clean new ones for the table. Student D collect your tables monsters and place them on the drying rack. Be careful not to touch the wet paint. Everybody did a great job today. Your monsters are coming along nicely. As we were walking around the classroom, we noticed how original and different each monster was. You all are doing a great job at using your imaginations when creating your artwork. Great job class. Now it is time to distribute the points for the tables that worked the most quiet, and cleaned up after themselves. |
D. CLOSING/ CULMINATING EXPERIENCE - Day 3
Once the points have been distributed to the class, their attention will be brought back to their imaginations. The students will be asked to show off some of the progress that they have made on their monsters to the rest of the class. Over the course of the week, the students will be asked to think about some characteristics of their monster, to add to the imagination of the project.
B. INTRODUCTION - Day 4
As the students file into the classroom the teachers will welcome them. They will quietly take their seats. They will be asked questions about where they are in creating their monsters.
C. SEQUENCE OF ACTIVITIES/ORGANIZER
|
Timing
2 Min 2 Min 10 Min 15 Min 4 Min 7 Min |
Teacher Questions/ Actions
Ask the students to settle into class and quietly take their seats Ask the folder monitors to pass out the student’s canvas boards to their owners. Student A to retrieve the paints for the table. Student B get the table papers towels. Student C retrieve the brushes and cups of water. Student D retrieve the monster reference mats. Ask the students to come to the demo table as they are called by their tables. Review the color wheel and discuss what the finishing touches need to be done. The teachers will then do a painting demonstration for the background. The students will be asked to return to their seats and continue to work on their monsters. The teachers will be circulating the classroom to assist the students as needed and check their progress. Once the students are finished with their monsters, they will be asked to place them on the drying rack. Then they will work on writing their colorful short story to be displayed with their monsters. Ring the bell for clean up. The students will be assigned jobs to help the cleanup process. The assigned jobs will be written on the board for the students to see. Recap of imagination and monster. A discussion around the classroom with each student showing off their monster and talking about what they were thinking about when they created their monster. They will also be asked to share some of their short stories with the class to help add to the creative process of their monster. The students will get their points before they leave like every class and prizes will be given to the tables that earned the most points during the student teachers lesson. |
Dialogue
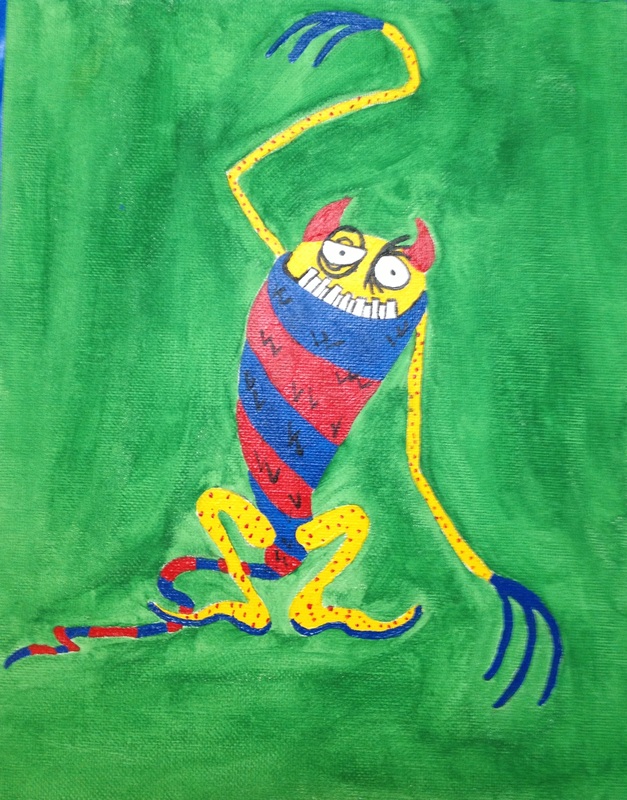
Good morning students! Please take your seats! Don’t forget to say “good morning” to the monsters as you are sitting down! Good Morning Captain Peanut! Today is the last day that we have to work on our monsters, so we need to finish them up and make them come to life! Class we are going to get started right away today with working. So we need the folder monitors to pass out the student’s canvas boards to their owners. Student A please grab the paints that we have already put on the supply table. Student B could grab the paper towels. Student C can grab the brushes and cups of water. Finally Student D can grab the monster reference mats for their table. Ok tables 1, 3, 5, 7 with your stools come up to the demo table. Tables 2, 4, 6 are next with your stools. Quick review. What are the three primary colors? Red, Blue, and Yellow! Great! Does anyone know the secondary colors? Orange, Green, and Purple! Good. Ok so has everyone gotten to the point where they are mostly done with painting their monster? (Most of the students raise their hands) Excellent! Today the focus is finishing up painting their monster and painting the background. Today, you can use the 3 colors that you have chosen plus, a secondary color for the background. For this teacher example (Sara’s), dark blue was used for the background of a monster that was dark purple. Because this was done, it is hard to see the monster, the depth is lost and so is the monster. You can now barely see the body in comparison to the back. If you look at the second teacher example (Tim’s) you can see that the monster really stands out against the background because the colors are high contrast, just like we had mentioned last week. Keep contrast in mind. So if my monster was primarily blue, what would be a good color for the background? Bright orange! Excellent answer! Does anyone have any questions so far? Can I use a dark color for my background? Only if your monster is light colored and will pop out from the background. Like we said you want your monster to pop out and not get lost in the background. Finally, Just be careful around the edges of your monster. Take your time. If you need to we will help you put the fixes back into your monster as needed. This is why we had you paint your monster first, so now any paint that ended up outside of the lines, you will be able to cover up. This is also why we had you outline in sharpie marker so after, you can go back in and make corrections as needed for the outline of your monster. Once you have finished painting your monster, and it is approved to be placed onto the drying rack we are going to have you write short stories, about 3 to 5 sentences about your monsters. These stories are going to add to the creativity of your monster. We are going to pass out sheets of lined paper for you to write on, in pencil first, and then can be gone over in color pencil or marker to make the stories stand out. These can be then pasted on a pre-cut sheet of construction paper and collected when you are done with your first and last name, and your homeroom teacher name on back. Once the monsters are dry, we are going to match them up with your monsters and hang them on display together. As you can see, one of the examples, is a cat like monster. So for this I would write: “Sophie, is a large beast that lives in the thick wooded areas of our world. Her bright orange spots, attract other creatures and animals so she can always have someone around her; she never likes to be alone. Sophie is nocturnal, she enjoys sleeping all day and playing and hunting at night in the deep dark woods. Being an ancestor of the cat, she enjoys climbing trees and chasing owls.” Class, do you have any final questions before we get to work? Okay! Please go back to your seats, and quietly get to work. Am I finished? Well do you think you are finished painting? Cause i see some spots that you can clean up around the body area. Okay, I’ll do that. I am finished, what do I do now? Oh thats so nice! Place your monster on the drying rack and then head back to your seat and start to write your short story about your monster. Remember to keep it 3 to 5 sentences. I got my background paint on my monster, what do I do? Okay thats fine, continue working with your background carefully and then we can go back into the monster and touch those parts up at the very end. How does that sound? Good! Thank you! I’m not sure what to write for my monster. Its easy. All you have to do is look at your monster and describe why they are the way they are. Use your imagination just like when you drew it out but now you are describing what you monster does and why. Like for example yours has tentacle arms right? So why or what does your monster do with its tentacle arms? Be creative. You good? Okay, stop what you are doing! It’s time to clean up. Student A collect the brushes from your table and take them to the sink to clean them properly. Student B collect and dump the dirty water from your table, and put clean water in the cups. Student C toss out all the old paper towels and replace them with clean new ones for the table. Great job class. Now it is time to distribute the points for the tables that worked the most quiet, and cleaned up after themselves. The table that was most successful at doing this, gets a prize from us. That table is... ( Will be determined by points in class) Now we are going to go around the room and everybody will show off your finished monster. Please explain to the rest of the class some information about their monster like, what parts of other creatures they thought of when creating their monsters. Also explain why you picked the colors you did. Finally, you can read the class your short story about your monster. Before you leave, please bring your short story about your monsters to the table and neatly stack them in a pile. Please line up for class students! You all did a wonderful job creating your monsters. |
D.CLOSING/ CULMINATING EXPERIENCE - Day 4
As the lesson comes to an end, the class will be reminded of the theme of imagination. Through imagination, the students were able to create their own monster and each were very different from the next, even if they used some of the same parts as another student. They were able to use their imagination in a creative way, while tying it in with other imaginative subjects.
E. ADAPTATIONS/MODIFICATIONS
ADD/ADHD - For students with attention disorders we will establish a routine for the beginning of class, demonstrating materials, cleanup, and discussion at the end of class to help keep the student on task. We will also, use shorter and clear directions when demonstrating the use of materials and reinforcing that with written visuals for the student to have additional reference for understanding the materials and the project. Finally, we will put in place small checkpoints for the student, to help keep them on task and allow them to create their work of art.
Auditory Impairments - For students with auditory disabilities they will be given all notes, lectures, and directions typed up before the class begins so that they may follow along during the day. They will be sat close to my desk or area so when we are going over materials they can have a good line of sight at my face. In addition, there will be handouts that are placed on the students tables for reference so the student can stay on task and follow along. Finally, when speaking we will make sure we speak slowly and clearly for the student so they can distinguish words and sentences easier.
IV. LESSON ANALYSIS
A. ASSESSMENT
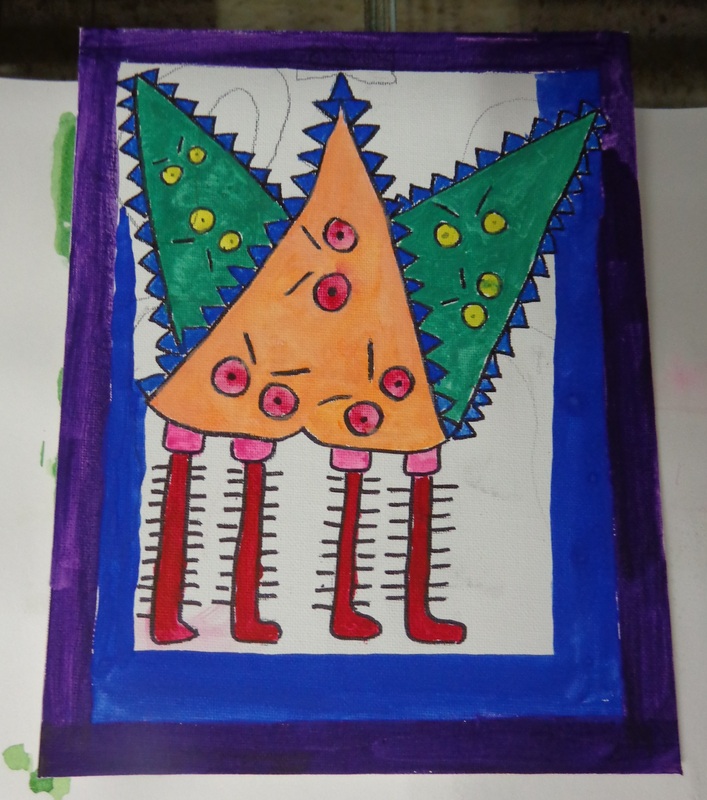
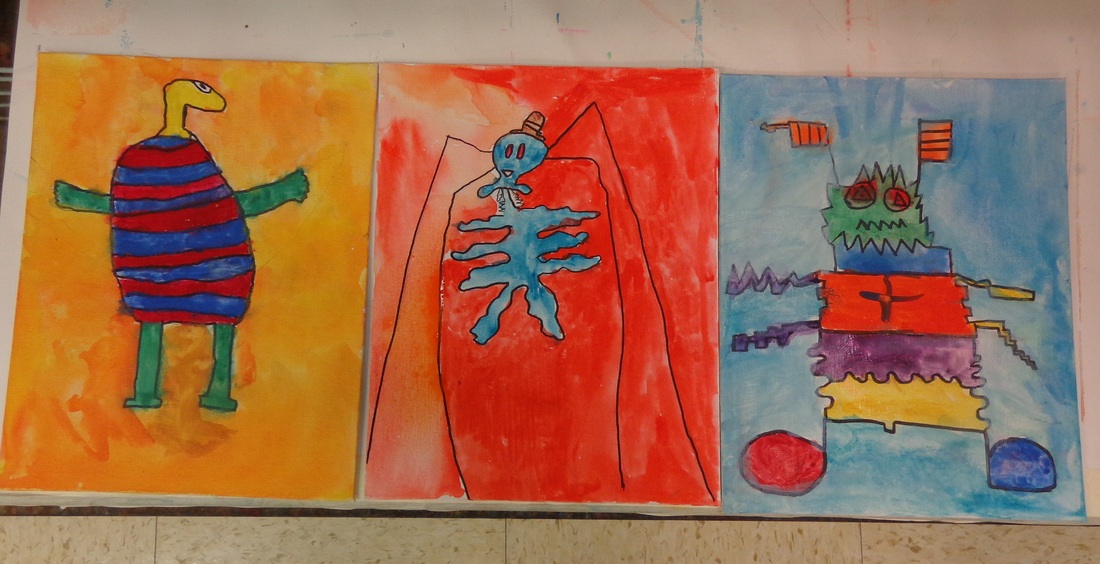
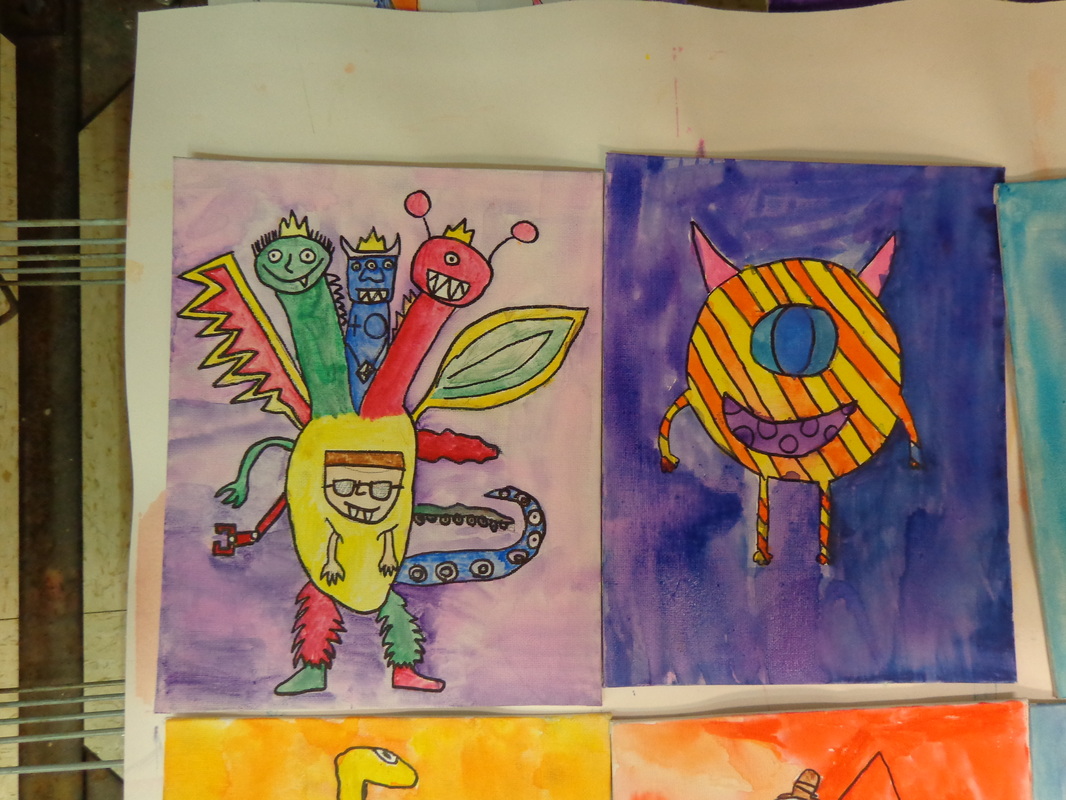
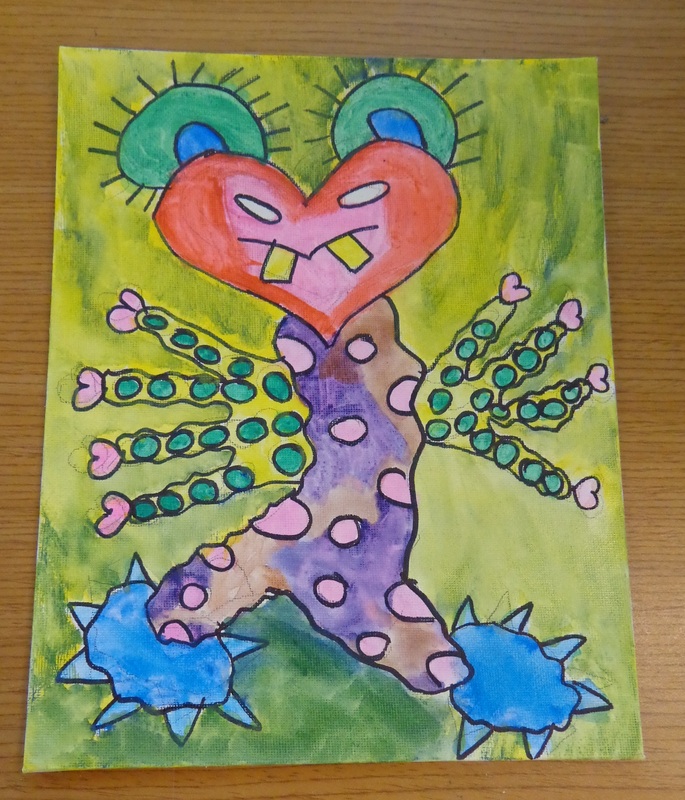
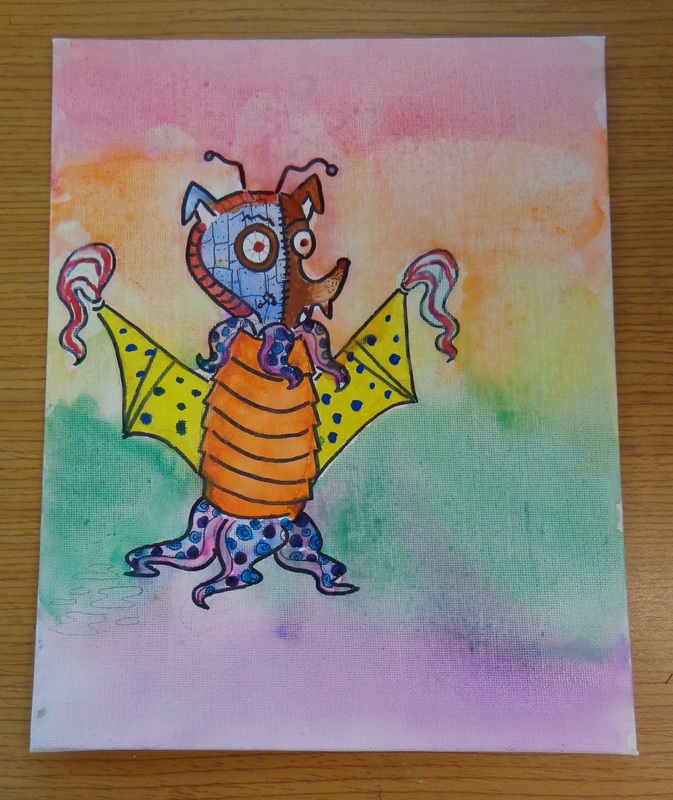
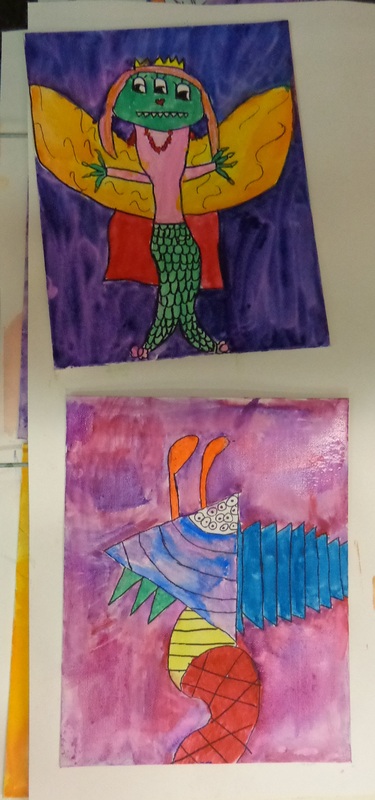
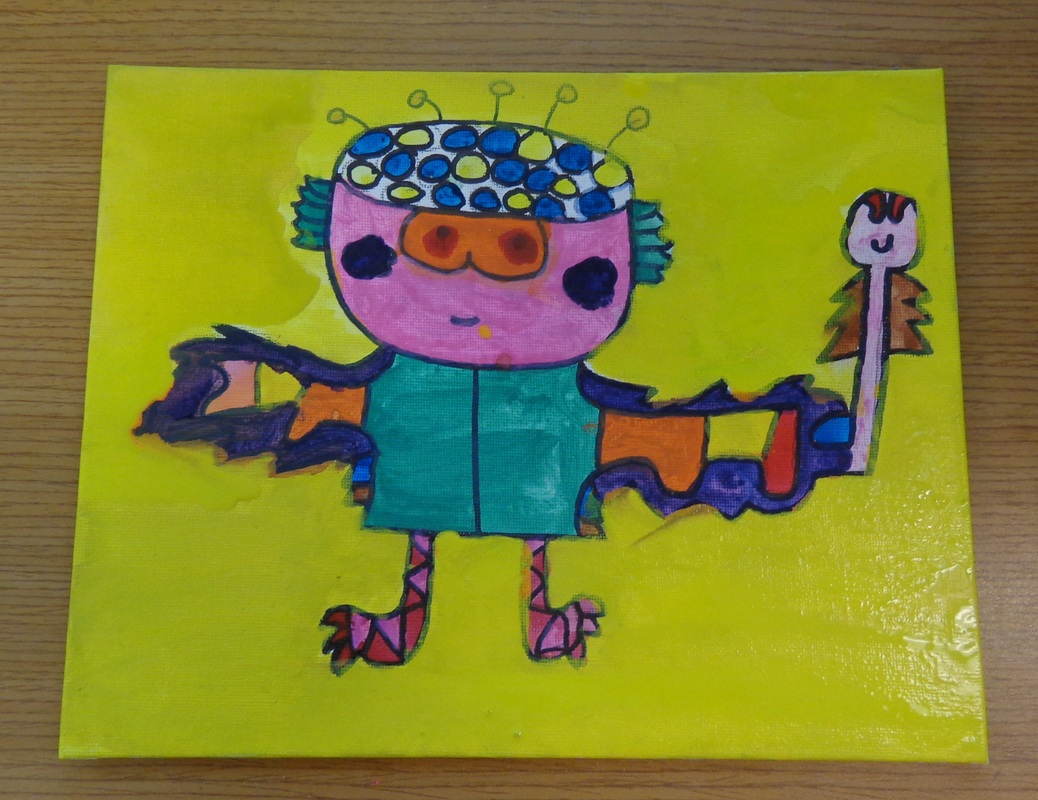
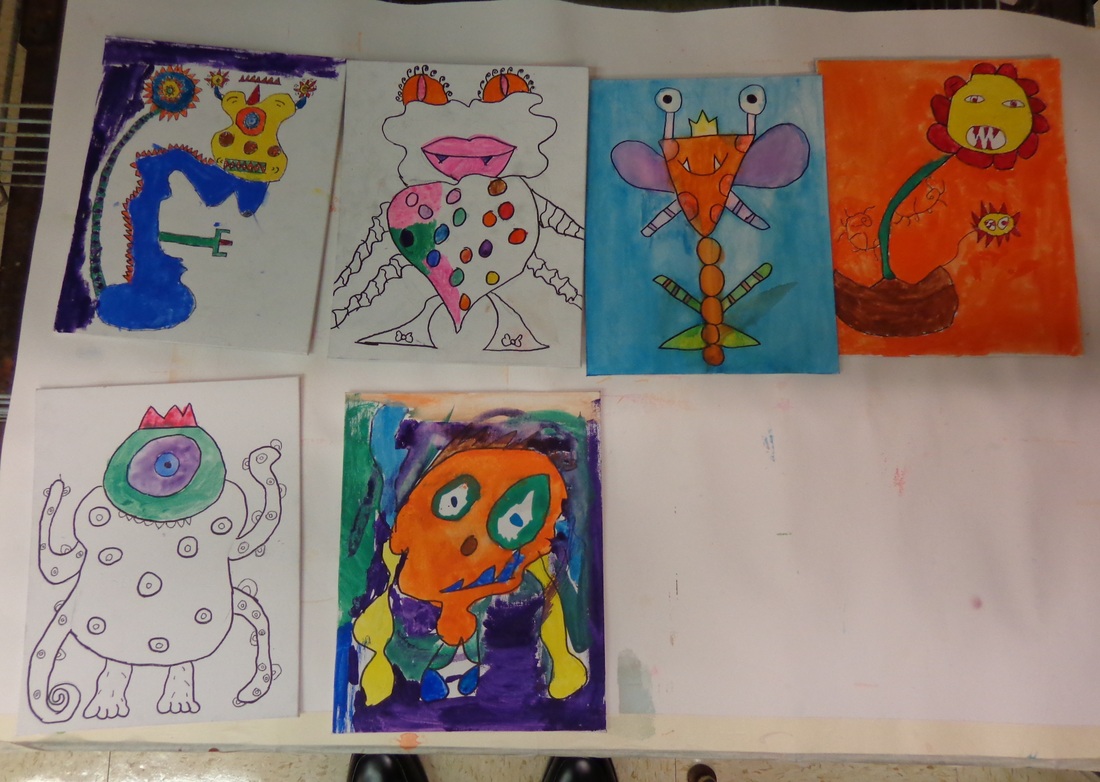
V. Teacher Example of Artwork, handouts, worksheets, etc.
-Student Artwork